
Rather than use GPG and SSH keys housed on individual machines, I embed my GPG private keys on Yubikeys by default. This allows me to keep my keys somewhat portable (i.e. I can use them on multiple devices) while preventing my keys from leaking if anyone accesses my machine without my permission.
This is the same workflow I use with my team to enforce various cryptographic controls with our projects. A specific encryption key manages email encryption and access to git-crypt-protected credentials. A signing key manages email and Git commit signing. A separate authentication key manages SSH access.
It's a strong way to protect our identities within the various tools we use, and one I recommend for just about any development team. To that end, a version of this article appeared in the March 2018 issue of php[architect], and I have an even longer version I distribute in person to developers.
Setting up your Yubikey
The goal of this walkthrough is to help you configure your GPG identity and port your keys to a secure hardware token - I recommend a Yubkey 4 (as it supports 4096-bit RSA keys). You can also use a Yubikey Neo, but this will only work with 2048-bit keys.
The basics we're going to set up:
- A 4096-bit master key that will be kept offline
- A revocation certificate that will also be kept offline
- 4096-bit sub-keys for encryption, signing, and authentication
- Publication of keys to Keybase and other directories
- Automatic signing of Git commits with the GPG key
- Configuring gpg-agent to act as ssh-agent for remote access
I'd love to recommend everyone use the newer elliptic curves available in GPG as they're powered by Libsodium and rapidly becoming a new industry standard. Unfortunately, the Yubikey hardware doesn't yet support this family of cryptography, so we've got to stick with battle-tested RSA for now. Using a 4096-bit key size with RSA gives us equivalent protection to a 256-bit elliptic curve key, so it's "good enough" for the moment.
Installing GPG
The following instructions require some format of GnuPG installed locally to behave. On Mac, this is as simple as running:
$ brew install gnupg2On Windows, this requires installing GPG4Win.
If you're running things on Windows, I'd highly recommend you reference Scott Hanselman's amazing walkthrough as well. The instructions that follow are more targeted towards *NIX environments, but Scott's article deals with some of the various edge cases that might pop up during Windows use.
Once installed, you can use either gpg2 or gpg from the command line to interact with the system (I'll use gpg2 below as it refers explicitly to the version of GPG we just installed).
Creating the Keys
Master Key
To begin generating keys, start with:
$ gpg2 --full-generate-keyOn the menus that follow:
- Select (4) RSA (sign only)
- Set keysize to 4096 bits
- I typically set expiration to infinity (0) - use a reasonable value for your use case
- Set your real name
- Use your email address
- Leave the comment blank
- Use a strong passphrase - but make sure it's easy enough to remember/type (you'll need it later)
Make a note of the generated key fingerprint and key ID. The key ID will be used in subsequent steps.
Sub-keys
Start adding sub-keys by editing the key we just created. Make sure to substitute your real key ID when you see KEYID in the steps that follow:
$ gpg2 --expert --edit-key KEYID

$ addkey
On the menus that follow:
- Select 4 - RSA (sign only)
- Set keysize to 4096 bits
- I typically set expiration to infinity (0) - use a reasonable value for your use case
Make a note of the generated fingerprint and key ID.
$ addkeyOn the menus that follow:
- Select 6 - RSA (encrypt only)
- Set keysize to 4096 bits
- I typically set expiration to infinity (0) - use a reasonable value for your use case
Make a note of the generated fingerprint and key ID.
$ addkeyOn the menus that follow:
- Select 8 - RSA (own capabilities)
- Press s to toggle signing
- Press e to toggle encryption
- Press a to toggle authentication
- Press q to save settings and create an auth-only key
- Set keysize to 4096 bits
- I typically set expiration to infinity (0) - use a reasonable value for your use case
Make a note of the generated fingerprint and key ID.
$ savePublishing the Keys
If no one has your public key, they can't verify your identity. Upload your public key to a keyserver with:
$ gpg2 --keyserver hkps://hkps.pool.sks-keyservers.net --send-key KEYIDIf you're using Keybase, you can also add your key quickly with:
$ keybase pgp select --multiThen select the appropriate key.
Add Additional Identities
It's often more trouble than you care to deal with to manage multiple identities and keys. Instead, it's easier to add secondary identities to the key we created above (i.e. your personal and professional email addresses). For example, my keys are bound to all of my online identities to make it easier for people to find me.
If you need to use GPG keys for personal emails/identities as well, you can add them with the following steps:
$ gpg2 --expert --edit-key KEYID

$ adduid
On the menus that follow, provide your real name, your email address, and an optional comment. You can add as many secondary IDs as you need. Once you're done, commit the changes with:
$ saveGenerate a Revocation Certificate for the Master Key
If your keys are ever compromised, you will need to revoke them with the public keyserver. Remember, if you lose your private key there is no way to revoke a key from the server so keeping a revocation certificate is a necessary step to proactively protect your security.
Generate the key easily with:
$ gpg2 --output KEYID.asc --gen-revoke KEYIDSpecify the revocation reason that "key has been compromised" and store the generated certificate in a safe, secure, and preferably offline location. You might not ever need this certificate, but if you do having it in a trustworthy place is critical.
Transfer Keys to the Yubikey
Configuring the Yubikey
The Yubikey ships with two default PINs, one for administrative use and one for daily use (i.e. unlocking your key for signing/decryption).
- Default PIN = 123456
- Default Admin PIN = 12345678
We need to change both of these to non-default values:
$ gpg2 --card-edit

gpg/card> admin

gpg/card> passwd
First change the PIN (remember it needs to be 6-digits long).
Now change the Admin PIN (needs to be 8-digits lon)
Press Q to save and quit the password menu. Type quit and press enter to exit the card editing screen.
Export Backups
Exporting your secret key to a backup is vital if you ever need to recreate your Yubikey for any reason. Preferably, this storage location is encrypted and offline (i.e. an encrypted USB stick) and in a safe, secure location.
$ gpg2 -a --export-secret-key KEYID >> /some/secure/location/KEYID.master.key

$ gpg2 -a --export-secret-subkeys KEYID >> /some/secure/location/KEYID.sub.key
I have two Yubikeys configured with the same keys. One is the primary I use day-to-day, the other is a backup in case of emergency. By exporting your keys, you can re-import a key to another Yubikey if necessary.
You won't likely need the backed-up subkeys any time soon, but if you ever want to sign someone else's keys you'll need the master key to do so. It's a good idea to not keep your master key available - think of it like root access to your identity. Instead, using your master key should require intentionality - like getting something out of a vault across town.
It's incredibly powerful; you should take care to protect it.
Actually Transfer the Keys
If you have other keys stored on your Yubikey, the following steps will overwrite them. It is impossible to extract a key from a Yubikey once it is there, so the previous step of exporting backups is vital if you ever need to recover a lost key or recreate your Key.
The following steps assume you created subkeys in the order specified above (signing first, then encryption, then authentication). If you followed a different order, your selections below might vary.
$ gpg2 --edit-key KEYID

gpg> toggle

gpg> key 1

gpg> keytocard

Please select where to store the key: 1 (Signing)

gpg> key 1

gpg> key 2

gpg> keytocard

Please select where to store the key: 2 (Encryption)

gpg> key 2

gpg> key 3

gpg> keytocard

Please select where to store the key: 3 (Authentication)

gpg> save
Once your keys are exported to the Yubikey they will no longer be present on your machine. Be sure to remove your master key (assuming it's properly backed-up) as well to make sure your machine is safe.
Configure GitHub Commit Signing
Export a Public Key
To export the public signing key for use with GitHub, merely ask GPG to export it to a file (the key will have ASCII armor so it will remain human-readable):
$ gpg2 -a --export KEYID > KEYID.ascConfigure GitHub
- Log in to GitHub
- Go to your settings by selecting Settings from the dropdown by your avatar
- Select SSH and GPG keys
- Add a new GPG key, coping in the ASCII armored text exported in the step above
Configure Git
Adding a default signing key is straight-forward. Merely run:
$ git config --global user signingkey KEYIDThis sets your key, but commits will not be signed by default (you must manually specify -S when committing to sign). To sign by default, run the following:
$ git config --global commit.gpgsign trueFrom this point forward, every commit you make will be signed with your GPG key (and will appear as "Verified" on GitHub). This has the advantage of proving that you and only you authored the commit (i.e. no one spoofed your identity in the commit logs).
[caption id="attachment_7997" align="aligncenter" width="744"]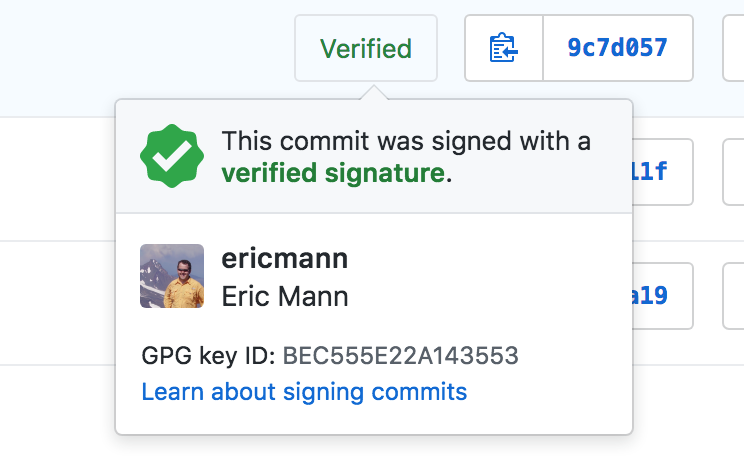 GPG commit signature on GitHub[/caption]
If for any reason you want to create an unsigned commit, add --no-gpg-sign in the command line when authoring your commit. This is useful if you're working remotely and temporarily lack access to your Yubikey.
Configure SSH Authentication
SSH will still use your default id_rsa.pub key for authentication at this point. We have to tell the machine how to use GPG instead and, conveniently, GPG agent has a flag to do just that:
$ gpg-agent --daemon --enable-ssh-support --write-env-file ~/.gpg-agent-infoThis command generates the environment variables necessary for SSH to use GPG for authentication and writes them to ~/.gpg-agent-info for future use. It's easier, though, to add them directly to ~/.bash_profile for consumption with the following block:
# GPG Agent

if test -f ~/.gpg-agent-info -a -n "$(pgrep gpg-agent)"; then
  source ~/.gpg-agent-info
  export GPG_AGENT_INFO
  export SSH_AUTH_SOCK
  export SSH_AGENT_PID
else
  eval $(gpg-agent --daemon --write-env-file ~/.gpg-agent-info)
fi
This code will test for the file first and regenerate it if it doesn't exist - if it does exist, it loads everything for you. From here on out, if you execute ssh-add -L to list out your loaded SSH keys, you will see one reported as an identity with your Yubikey's card number instead of an email address or path name. If you want to grab your public key directly, run:
$ gpg2 --export-ssh-key SUBKEYIDWhere SUBKEYID is the ID of the third sub-key you generated earlier. (This will often be the last key in the list if you run gpg2 --list-secret-keys as well.)
Next Steps
This walkthrough just covers the GPG features of your Yubikey. The hardware can also be used as a PIV card to house X509 certificates. It's also a great 2FA device, supporting both OTP generation and FIDO's universal second factor (U2F) spec.
I use my Yubikey daily to:
- GPG-sign every email I send from my workstation
- GPG-sign every Git commit
- Authenticate to remote SSH servers
- Encrypt/decrypt sensitive credentials on my machine
- Respond to U2F challenges from services like GitHub and Gmail
How will you use your Yubikey?